An intro to Appwrite | Building a To-do list with SvelteKit
A to-do list is the playground for experimenting with a new technology, right? It ain't much but it allows you not only to understand the basics but also to get familiar with the docs for any extra 💫 dazzle 💫 that you may want to add. And that's exactly what we'll do with Appwrite!
What is Appwrite?
Appwrite is an open-source BaaS (Backend as a Service), and it provides pretty much all the tools that you might need to get a backend up-and-running, such as Authentication, Databases, Functions and Storages; since there's no point in repeating what has already been said by others, please check this blog post to learn more about how Appwrite is structured and how it works.
Starting the project
We'll need, of course, to start a Svelte project so let's follow their walkthrough to do so.
npm create svelte@latest svelte-appwrite-todo-app
cd svelte-appwrite-todo-app
npm install
npm run dev
Just make sure to select the Skeleton option since we don't need the Demo code for what we're doing.
Once you have the project running, let's now initialize a project on Appwrite. We can also follow their guide for that; just make sure to stop before step 5 since we don't need to get into the Login page setup.
Appwrite structure and config
Alright, we should now have a base project to start working on and we're ready to extend it. We'll start on Appwrite's side!
Head over to your Appwrite console and select your project in there. Head over to Databases and you'll see an empty table.
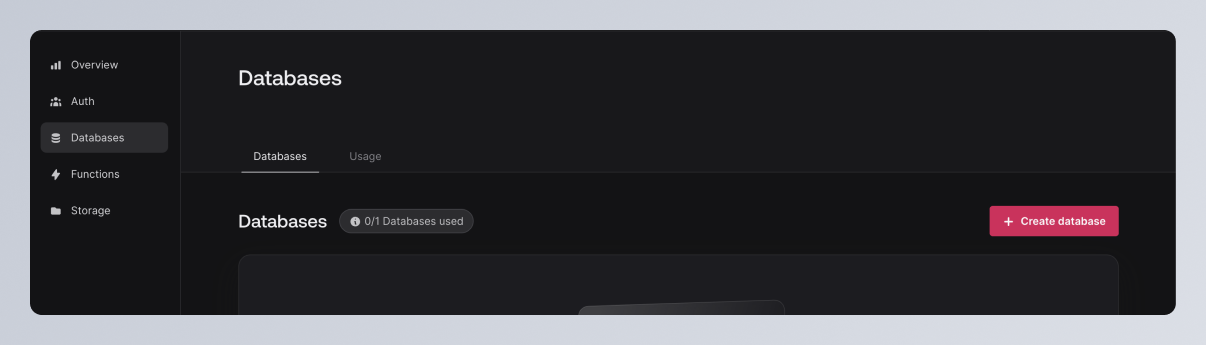
Let's create a new database (name it whatever you want but I'll call mine Todos). After that, you'll be sent to a new screen for the Collections; if you followed Appwrite's blog post, you'll know that Collections are groups of Documents - for our app this means that todos (notice that it's all lowercase, different from the Todos database name) is our collection and each document will be a todo.
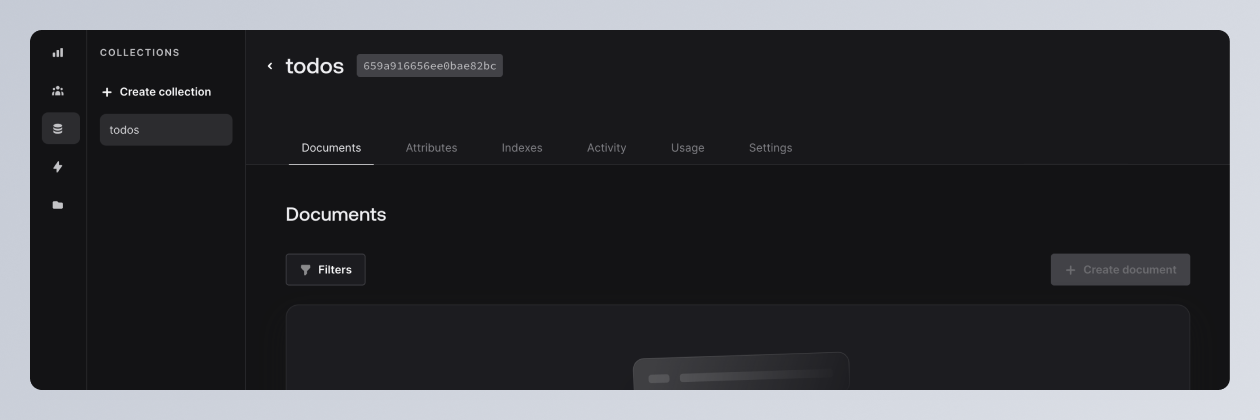
Create your collection and you should see a new screen for the documents (currently empty) inside that said collection.
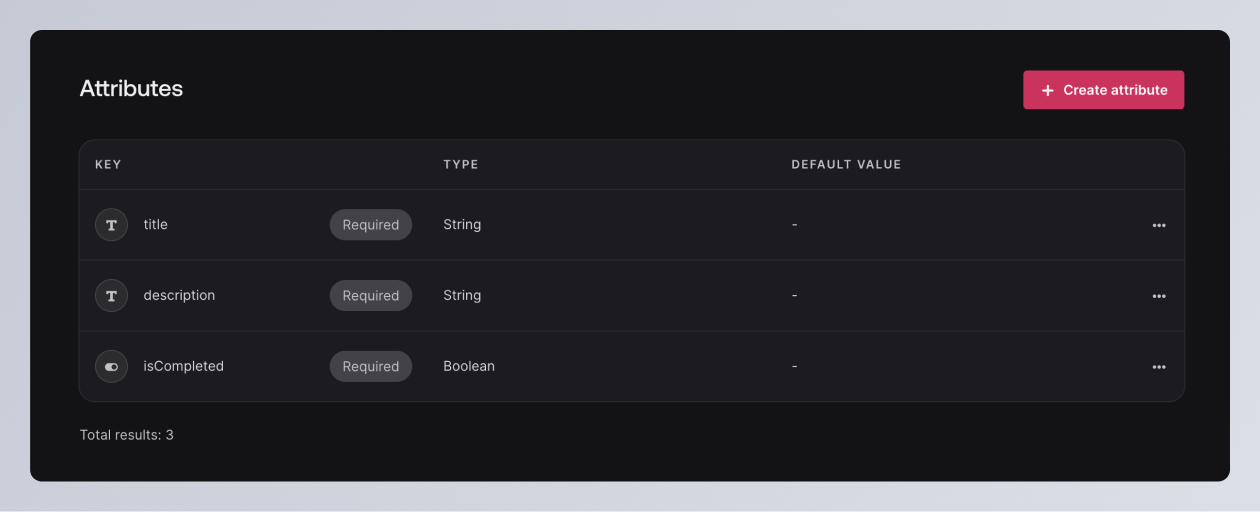
Now, you won't be able to create any document because we need to define the properties (or attributes, in the Appwrite's console) that will compose each document. We'll create 3 different attributes: title, description and isCompleted. title and description will be strings and isCompleted will be of type boolean, and the 3 will be set as required - just follow the different prompts that Appwrite provides for creating an attribute but make sure that the types match the tutorial.
Now we're ready to start creating documents and we'll do that from our codebase, of course! 💃
Connecting our created database to the code
We'll be working with databases' ids and different info that should be secured so I would advise you to create a .env file to store said info. We'll do this by installing dotenv into our project and use it accordingly:
npm install dotenv --save
Now on the codebase, create a .env file and fill in the info for each variable that I show here (go back to the Appwrite guide if you get lost on where the ids are):
APPWRITE_PROJECT_ID=
APPWRITE_ENDPOINT=
APPWRITE_DATABASE_ID=
APPWRITE_COLLECTION_ID=
On our appwrite.ts file (or .js, as you wish, just remember to remove the types from your code if you're not using Typescript) we can now replace the hardcoded values for your variables:
import { Client } from 'appwrite';
import {
	APPWRITE_ENDPOINT,
	APPWRITE_PROJECT_ID,
	APPWRITE_DATABASE_ID,
	APPWRITE_COLLECTION_ID
} from '$env/static/private';

const client = new Client();

client.setEndpoint(APPWRITE_ENDPOINT).setProject(APPWRITE_PROJECT_ID);

export { client };
I've removed the Account definition because we won't need it (for this tutorial) and changed the exports a bit just due to preference.
Now, if you try to start a project, you'll be invited with a blank page with an error and if you look at your terminal you'll see AppwriteException: The current user is not authorized to perform the requested action. By default, Appwrite doesn't make assumptions about who can access which database or which collections so everything will be blank (aka, no one can access anything) so we need to solve this.
Head over to your collection and choose Settings. Scroll to Permissions and create a new role; for this tutorial we can start by selecting All guests and allowing for them to perform any action.
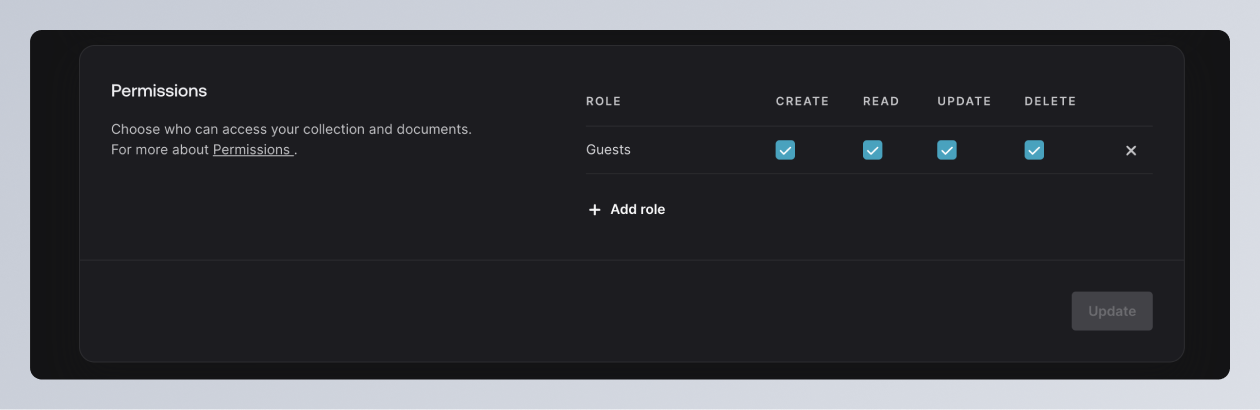
⚠️ For an actual app you wouldn't want to have this kind of role performing all kind of destructive actions but it works well enough for this tutorial.
Now, if you refresh your app in the browser, the error should have disappeared! Congrats, you've made your app extremely insecure (I'm just kidding! 😄)!
Finally, some actual code 😄
Now, our app will look incredibly boring but it will be plenty for this tutorial.
For starters, please copy & paste the following code into src/routes/+page.svelte for the initial look:
<script lang="ts">
</script>

<main class="column">
	<div class="todos-container box column">
		<h1>SvelteKit Appwrite To-do App</h1>
	</div>

	<form method="POST" action="?/create" class="box column">
		<div class="input-container column">
			<label for="title">Title</label>
			<input type="text" name="title" />
		</div>

		<div class="input-container column">
			<label for="description">Description</label>
			<input type="text" name="description" />
		</div>

		<button>Add Todo</button>
	</form>
</main>

<style>
	main {
		margin: 0 auto;

		max-width: 480px;

		font-family: 'Segoe UI', Tahoma, Geneva, Verdana, sans-serif;
		color: #3e4850;

		gap: 1em;
	}

	.box {
		padding: 1em;

		border: 1px solid #ccc;
		border-radius: 8px;
		box-shadow: 0 0 8px rgba(75, 79, 91, 0.1);
	}

	.column {
		display: flex;
		flex-direction: column;
	}

	.todos-container {
		gap: 1em;
	}

	.todo-container {
		gap: 0.2em;
	}

	.todo-container:not(:last-of-type) {
		padding-bottom: 1em;

		border-bottom: 1px solid #ccc;
	}

	.title {
		font-weight: bold;
	}

	.description {
		font-size: 0.8rem;
		color: #717378;
	}

	h1 {
		margin: 0;

		font-size: 1.5rem;
	}

	p {
		margin: 0;
	}

	form {
		gap: 0.5em;
	}

	.input-container {
		gap: 0.5em;
	}

	label {
		font-size: 0.8rem;
		color: #717378;
	}

	input {
		padding: 0.5em;

		border: 1px solid #ccc;
		border-radius: 4px;
	}

	button {
		padding: 0.5em;

		border: 0px;
		border-radius: 4px;
		background-color: #151c29;

		color: white;

		cursor: pointer;
	}
</style>
We now have a foundation for our work and we're ready to make our first API call - getting the to-dos from our collection.
We'll start by going into our appwrite.ts file and create and export our function:
[...]

const getToDosFromDatabase = async () => {};

export { client, getToDosFromDatabase };
So, what do we need to do in our function? We need to get inside our database, pick the collection that has the to-dos and be able to grab all of them! Appwrite offers an excellent documentation and examples for all your needs so you shouln't have a problem doing so but let's go step-by-step.
To work with Appwrite databases, their API offers a Database class that has the necessary methods, so we can start by adding it to our appwrite.ts
[...]
const databases = new Databases(client);
[...]
Now, if you look at their documentation you'll find the listDocuments method, which is exactly what we need. It takes our APPWRITE_DATABASE_ID and APPWRITE_COLLECTION_ID and an additional optional argument to provide extra context to our query to filter it out; for us, the two required arguments are more than enough and our getToDosFromDatabase will look like this:
const getToDosFromDatabase = async () => {
	const { documents } = await databases.listDocuments(APPWRITE_DATABASE_ID, APPWRITE_COLLECTION_ID);
	return documents;
};
I'm solely getting the documents from the response because I don't really have a need for the full object that comes as a result, which provides a total and the documents!
With that, our appwrite.ts will now look like the following:
import { Client, Databases, ID } from 'appwrite';
import {
	APPWRITE_ENDPOINT,
	APPWRITE_PROJECT_ID,
	APPWRITE_DATABASE_ID,
	APPWRITE_COLLECTION_ID
} from '$env/static/private';

const client = new Client();
const databases = new Databases(client);

client.setEndpoint(APPWRITE_ENDPOINT).setProject(APPWRITE_PROJECT_ID);

const getToDosFromDatabase = async () => {
	const { documents } = await databases.listDocuments(APPWRITE_DATABASE_ID, APPWRITE_COLLECTION_ID);
	return documents;
};

export { client, getToDosFromDatabase };
Alright, so, where do we plug this getToDosFromDatabase? Svelte has a couple of ways of loading data, but, to cut it short, we'll use a +page.server.ts; my reasoning is that we're dealing with the ids of our project, database, and collection and that's not really something that we really want to expose to the user. Also, we're gonna have some form actions and we need a .server.ts file anyway!
So, on the same level as our +page.svelte we create a +page.server.ts and in it we can have a load() function where we call our getToDosFromDatabase, like so:
import { getToDosFromDatabase } from '$lib/appwrite';

export async function load() {
	const todos = await getToDosFromDatabase();

	if (todos) {
		return {
			todos: todos
		};
	}
}
We're now able to get the data from the return via the data property on our route and we can render stuff accordingly:
<script lang="ts">
	export let data;
</script>

<main class="column">
	<div class="todos-container box column">
		<h1>SvelteKit Appwrite To-do App</h1>

		{#if data.todos && data.todos.length > 0}
			{#each data.todos as todo}
				<div class="todo-container column">
					<p class="title">{todo.title}</p>
					<p class="description">{todo.description}</p>
				</div>
			{/each}
		{:else}
			<p class="empty-message">
        There are no To-dos. Create your first one!
      </p>
		{/if}
	</div>

	<form method="POST" action="?/create" class="box column">
    [...]
	</form>
</main>

<style>[...]</style>
So, if there's data and there are todos in data, we render each of them; if there's not, we just display a message saying so. At this point you should be able to see the empty-message paragraph, so, that's a good guiding star!
Let's mutate stuff, shall we?
Ok, we can now connect to our database and get the non-existent documents in our collection, but we want to actually place stuff there and doing that via the Appwrite dashboard is not very mega frontend dev of us, so let's fix that!
The Databases() class also provides a createDocument() method, and by identifying our database and our collection ids, we can use it! On our appwrite.ts we add the following:
[...]

const createTodo = async (title: string, description: string) => {
	const result = await databases.createDocument(
		APPWRITE_DATABASE_ID,
		APPWRITE_COLLECTION_ID,
		ID.unique(),
		{
			title,
			description,
			isCompleted: false
		}
	);

	return result;
};

export { client, getToDosFromDatabase, createTodo };
So, should be obvious on what's happening here but let's summarize it: createTodo takes a title and a description argument and we create an object (aka, a document entry on our collection) with the expected structure: title, description, and the isCompleted property that should start as false.
So, to connect stuff up... I've already added the form with its action on our +page.svelte code so stuff there is done, and, like I mentioned before, it's going to be on the +page.server.ts that we'll work with the form actions.
Looking at our form element you'll see that the expected action is create so we can start by that:
[...]

export const actions = {
	create: async ({ request }) => {}
};
Now we need to get the title and description and send them as arguments on our createTodo; with Svelte and its actions, it is expected that you access the form info via the request property.
import { getToDosFromDatabase, createTodo } from '$lib/appwrite';

[...]

export const actions = {
	create: async ({ request }) => {
		const data = await request.formData();

		const title = data.get('title') as string;
		const description = data.get('description') as string;

		if (!title || !description) {
			return {
				status: 400,
				body: {
					message: 'Title and description are required'
				}
			};
		}

		const result = await createTodo(title, description);

		return {
			status: 200,
			body: result
		};
	}
};
Try your form now, I'll wait! ... ... ... Pretty cool, uh? 😜
Where to go next?
This post is already pretty long so I'm cutting it short right here; I might do a part 2 for the isCompleted attribut and for the authentication (remember the permissions? Yeah, we definitely don't want to release an app with that) but I would like to offer you the challenge of figuring it out for yourself.
You can find the full code here.
The challenge
- We're missing a way to set a to-do as complete but we already have a
isCompletedattribute. Look into Appwrite's documentation to figure out if there's a way of updating a document; once you have the method, create a function for it on theappwrite.tsand then find a way to connect it to the to-do that you want to mark! - Due to the way we set our permissions, anyone can change the to-dos and add more to the list and that's a huge problem! This is a much bigger challenge but, ideally, there would be a way to authenticate a user and we would change the permissions on our
collectionto allow justusers(or maybe even just a specific role) to update theto-dos.
Are you up to the challenge? 😉 I promise you won't regret it if you follow it through!
And that's it!
Hopefully I've spiked your interest for Appwrite with this post and you're now eager to add a new tool to your belt! 💃 As always, if you have any doubts, feel free to reach me via X